Tuesday, 17 December 2013

Cockpit table restoration


The teak table that hinges upward from my Edson steering pedestal is made of solid teak.  Over the years it has had successive coats of varnish, but no sanding/refinishing   

As a result, the finish is very thick, but uneven.  The varnish has become quite orange.

Here is a photo of the table removed from the boat, sitting on my kitchen bench:

You can see how proud the wood grain is, and how the pores of the teak have gone black.


I started by stripping and scraping 95% of the varnish off, then spent an evening sanding the table back to a smooth surface.  I'm using plain old spar varnish, because this table resides under a cover, and a flawless finish is more important to me than durability.

I should have some "in progress" photos soon.

Update 2/12/13

Work is underway - a lot of sanding


UPDATE 13/12/13

7 coats of varnish, sanding lightly with 320grit paper between each coat.  Varying temperatures and conditions have caused me difficulty, as I have had to thin or not thin on a 'best guess' basis.  I will need 2 or 3 more perfect applications to get the result I want (10 coats total).  It is extraordinarliy-difficult to get a mirror-smooth finish...I don't know how the pros do it.


UPDATE 17/12/13

DONE!

...and that's 10 coats


...mandatory before and after...


Thursday, 12 December 2013

Re-naming

I will be re-naming the boat over Christmas during haul-out.  The original name, when she was sailed in Texas, was "Effervescence", and this was changed to "Kiss Kiss" (after the Roald Dahl book).

The unstayed rig is very unique here in NZ, and I wanted to re-name her to play on this.  Here is what I have come up with:


Monday, 9 December 2013

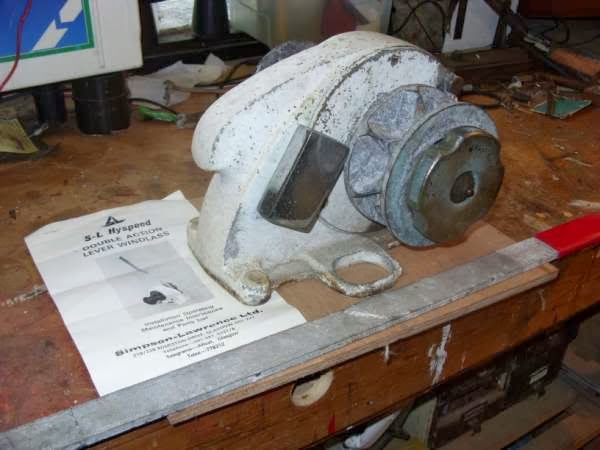
Simpson-Lawrence SL Hyspeed Windlass Restoration

The manual windlass at the bow of my boat has always bothered me.  I never use it, but it was in bad visual condition, and being so obvious, I think it said something to the passing public...something like "this boat is in decline".

So with the brilliant weather that November brings in the Southern Hemisphere, I have decided to restore it.

For some unknown reason, I failed to take a "before" photo, so I found one on the internet that represents the condition it was in before I started:

Thank you to the owner...whoever you are...mine was actually worse, paint coming off in large flakes.


I will shortly upload an "after" picture, which will show the result of careful disassembly, stripping, sanding, priming and painting.  It has turned out very nice.


For anyone considering the same project, here is a link to the original owner's manual:

http://www.lewmar.com/%5Cassets%5Cimg%5Cdataset%5CManual-S-L%20Hyspeed-D1021-1.pdf

UPDATE 7/12/13

It's all back together, looks good. I caulked the seams after this photo was taken. 


Wednesday, 20 November 2013

Painting the rest of it...

I suppose once you venture down this track, you are somewhat obligated to see it through.

I've begun painting from the engine room bulkhead back, pulling bundled wires and hoses away as I go, cleaning and scrubbing with a mixture of Simple Green and Sugar Soap.  I'm still priming everything with the magic sauce I found earlier (Zinsser Bulls Eye 1-2-3 primer...which I am convinced you could use to prime a pan of bacon fat).

Painting around the engine is challenging, and will eventually require specialist tools, such as a paint-brush with the handle cut off, an extended roller, and several artist's brushes.


One coat of primer.  Note the vertical face 90 degrees opposite the Racor filter.  This will be the location of my new fuel-polishing/fuel redundancy system.


UPDATE 11/11/13

A HUGE amount of work...just priming it all is almost too much, to think I have to go back twice more with the top coat is unthinkable.  I am using an artist's brush and long handled brushes to reach up under the cockpit coaming and get around all the wiring and hoses...wow....don't do this...live vicariously through me...


Update 20/11/13

First coat of gloss enamel on the starboard aft section...very awkward and tedious work.   Note the original battleship grey colour to the right of the autopilot ram. 


UPDATE 2/12/13

I can't quantify or prove this, but I swear with 50% of the area under the cockpit now painted, particularly the area around the engine, the noise coming from the engine has been dramatically-reduced.  The thickness of the primer and 2 coats of enamel must be functioning somewhat like the noise-reducing paints you see advertised (Silent Running) to quell vibration.  It is really quite obvious.
I am beginning to wonder if actually using the proper noise-reducing paint wouldn't be such a bad idea.  It's not cheap, but neither is the purpose-built sound-insulation.